
Mesh Rod Laver® Shoe
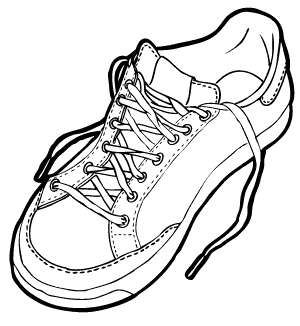
The adidas mesh Rod Laver® is one of the best and most popular freestyle footbag shoes.
Insole modification
It is recommended to replace the standard insole with a better sport insole (e.g., Spenco shock-absorbing insoles).
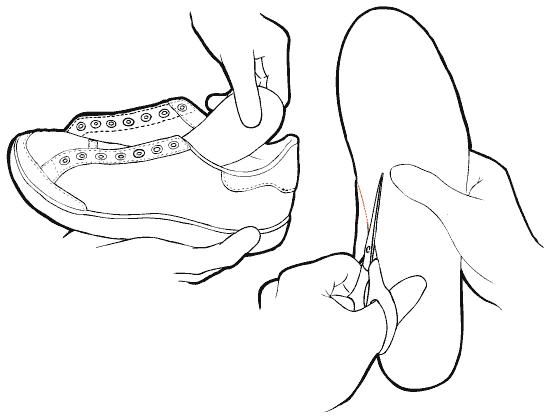
Toe-box modification
Cut the seam for an open toe box.
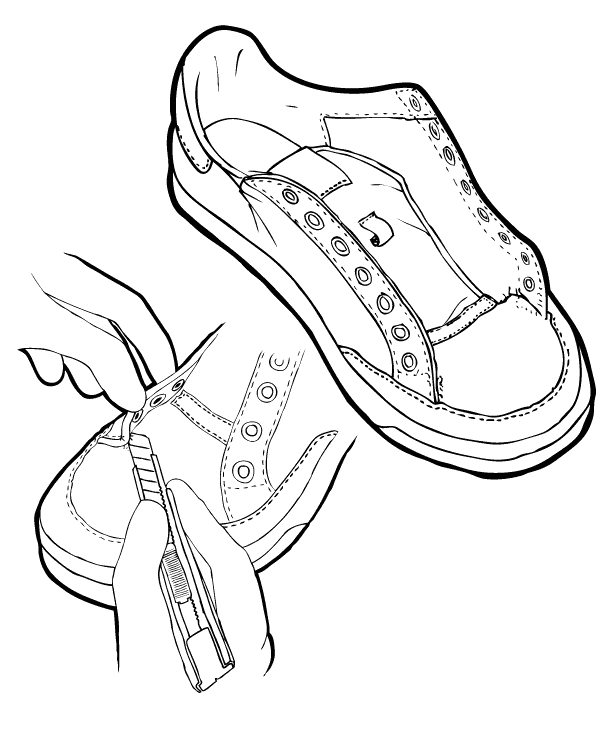
Inside modification
The sides of the Laver shoe are actually two layers — a canvas layer on the inside, and a nylon mesh layer on the outside. If your Lavers are new, the canvas layer is most likely still glued to the mesh layer. However, if you put your Lavers into warm water for about 15 minutes, the glue will dissolve, making the following steps easier. As an alternative, you can use a hair dryer to heat the glue.

If it helps you draw a line before you cut. Find a pointy and sharp tool to make the first incision.
Note that some players prefer to remove the outside layer of fabric rather than the inside layer of fabric, sacrificing looks over having a more grippy surface. The basic cutting technique is still essentially the same except that you will be cutting off the outside layer of mesh fabric. (This alternate method is preferred for leather Lavers.)
After the inside modifation you can also cut out the canvas from your toe box. If you plan on doing the (currently underutilized) outside stall, you can also apply the same basic techniques on the outside portion of the shoe.
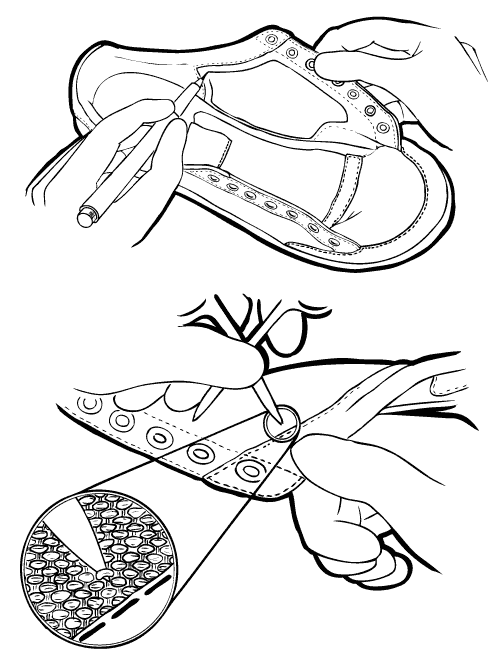
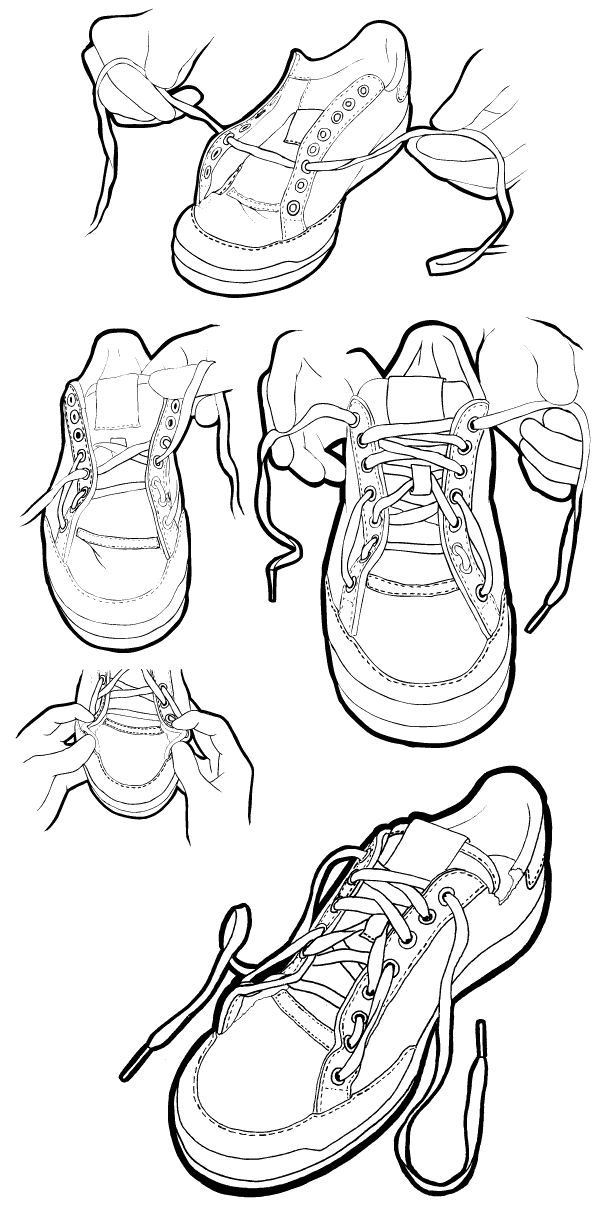
Lacing technique
There are many ways how to lace. This one is quite popular (see image).
Leather Rod Laver®
The leather Rod Laver® is a generally less accepted form of the adidas Rod Laver (which is normally the nylon mesh version), but is still used nonetheless by some players because they look cool.
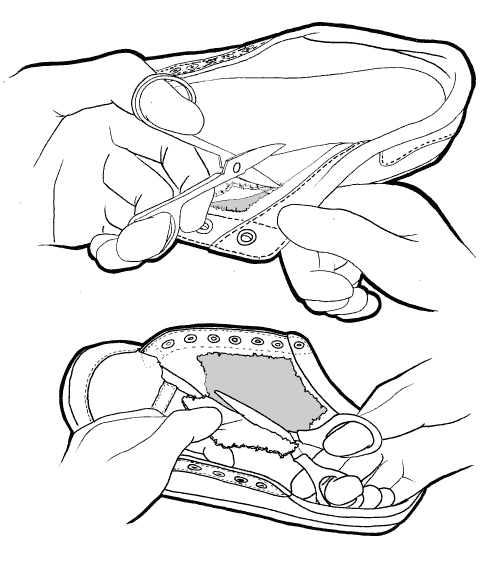
To make the Leather Rod Laver a more suitable shoe for freestyle footbag, you have to modify it a little bit differently than the mesh version above. You usually cut off the outer leather of the shoe instead of the inside mesh. There are only two layers of matieral protecting your foot inside the shoe, this is a white crossy mesh, which can be seen on the inside of the shoe, and the outside leather. Keeping this in mind, take a sharp knife and have some fun doing the following, as needed.
Toe Box
I recommend modifying the toe box leather off, after you have done the “Toebox mod” shown in the Mesh Rod Laver tutorial. First, you take your blade of choice, and “score” or “slit” the perimeter of the toe box. Make sure it is only a millimeter or so deep, not penetrating the mesh underneath. After you are satisfied with the amount taken out, you can begin pinching, and slowing slitting the inside of the toe box, where there is a noticable edge ([Said Edge[1]].) Once you can see the definite line of mesh and leather, you can further pull and cut the rest of the surface leather away along the previous lines you slit. It will be a bit sticky, but the mesh is strong enough to take some pulling.
[Toe Box and removed leather[2]]
Inside
This process is exactly the same as the Toe Box, however, you do not have an outside edge to work with. I would just recommend pinching the material, and making tiny cuts at a time until you can safely distinguish the leather and mesh. Then, cut away! Another note, is keep inside the stitching line, but apart from that only mod as much as you feel is neccessary. [Inside Modded Leather[3]]
![[1]](http://img244.imageshack.us/img244/3622/p1010671ij4.jpg)
![[2]](http://img170.imageshack.us/img170/52/p1010669wk3.jpg)
![[3]](http://img104.imageshack.us/img104/7863/p1010672db4.jpg)
Outside
If you do alot of outside stalls and dragons (cross body outside stall) then this may be of use, however since they are not commonly used in freestyle footbag it is not commonly done. Removing the outside may lead to a bad “breaking-out-of the shoe-feeling”, which you might not like. It is the best to test shoes with this mod to make clear if it is an advantage or a disadvatage for you.
Once you have modded this leather from the outside of the shoe, all further mods should be the same as when modifying the more popular Mesh Rod Laver, such as the Brocka (pronounched, “Brochka”) mod.