Footbags
For playing footbag net, the choice of footbag is
very important. Players need to be able to accurately direct the footbag, deliver
powerful shots, and not have the bag "flop" around. Footbag net players
tend to look for round, firm, and sturdy footbags -- i.e., footbags
that don't break in too much, hold their shape, and aren't too hard to kick straight
up or over the net.

There are really only a few footbags well-suited to the game of footbag net. The
"Net Juice (TM)", made by Flying Clipper Footbags, is the current
bag of choice by most advanced footbag net players. The Net Juice is a 32 or 42-panel
bag, made of vinyl and/or leather combinations.
Net Shoes
The best shoes currently used for playing Footbag
Net are:
Brooks ® BEAST (shown above, considered
the best shoe on the market in 1999 by top players)
Nike ® NDESTRUKT AIR TUFF (no longer
produced and very hard to find)
Saucony ® JAZZ 5000 (good surfaces,
but lateral stability is an issue)
Shoes should have solid but flat insteps and outsides,
as well as a firm, slightly rounded toe. The next most important thing is traction
-- a good sole is a must for the shoe. Many serious net players modify their shoes
whith special materials to flatten the curves in the shoes.
The Net Court
A Footbag Net Court is identical to a badminton
court with the following dimensions:
The net itself is a standard badminton net attached
to two stanchions (posts) with a width of 20 feet and a height of 5 feet.
Buying a Net Set
You can buy any badminton net and use it for footbag,
however, this is not recommended because of the different way footbag is played (namely,
with your body in the air). When you "crash the net", you want to be assured
that it will react appropriately -- i.e., you won't get hurt and the net will fall
down without breaking.
So the best bet, and our number one recommendation
for net players, is to use the: JimmyC Net Set (shown
to the right), available from the World Footbag Association.
|
|
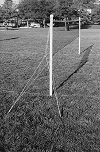
Making a Net Set
If you are low on cash (as many footbag players
are), you can somewhat easily construct your own net set with materials costing less
than $40 (U.S. currency). Here is what you need:
- - 1 badminton net. This can be purchased at most
sporting goods stores. Or you can order one from the WFA through their
Footbag
World publication.
- - 2 posts. These can be any type of post or pole
that is at least 5' 1" in length. Some good candidates are; 2"-3"
schedule 40 PVC tubing, 2x2 wooden studs, 2" wooden dowling, or even extra long
push broom sticks.
- - About 30' of cord or thin rope for guy lines.
- - 4 spikes to attach the guy lines to. These should
be 6-8" long. The stakes used for tents are usually a good choice and can be
found at camping supply stores, sporting goods stores, or Army surplus stores. They
sell 7" spikes with a plastic piece (green or orange) at the top so the rope
doesn't slip off.
- - At least 128 feet of rope for boundary lines
(It is recommended that you have more like 132 feet). Yellow nylon rope at least
3/16" in diameter is most desireable.
- - At least four 3" nails to attach the boundary
lines to the ground.
To construct the net, first attach the badminton
net to the two post. Attach the top of the net first, making sure that the distance
between the two posts is 20' when the net is pulled taut and the distance from the
top of the net to the bottom of the post is 5' on both sides. Once you have attached
the top of the net, the bottom of the net should be attached. It should be pulled
taut from the top and from the other side so that it can provide some bounce off
when the footbag is passed into the net. You may also want to use some ties to pull
the middle taut for even more play off the net.
Once you have attached the net to the post, you
will need to attach the guy lines to the posts. Take a 15' length of cord or thin
rope and create a loop at the mid point and a clove hitch or slip knot on both ends.
Repeat this with another 15' length. When you set up the net, you will put the loop
for each guy line on the posts and then pull the guy line at 30 degree angles from
the post so that the net is taut. Usually, this will take at least 3 people to coordinate.
The slip knots may be used to tighten the net. The spikes should be put in at 45
degree angles from the post so they are less likely to slip out if someone crashes
the net.
Before you can even set up the net, you will need
to have your boundary lines set up. To construct the boundary lines start at one
end of the 132 foot rope and attach one of the 3" nails. This can be done several
ways, the most common being to tie a knot around the nail. Sink the nail into the
ground and pull the rope taut measuring out 44 feet. Attach the second nail and sink
it into the ground. At the halfway point, 22 feet, make some kind of mark to indicate
where the net line. This can be done with a a colored string or electrical tape.
Now, measure off 20 feet from the second nail, pull the rope taut and attach the
third nail. Again, make some kind of mark at the halfway point (10 feet). This will
be the center line marker. Repeat the process above with the second 44 foot length
and 20 foot length. You now have a set of boundary lines.
|
