|
|
|
|
|
|
|
|
|
The Net CourtA Footbag Net Court is identical to a badminton court with the following dimensions:
The net itself is a standard badminton net attached to two stanchions (posts) with a width of 20 feet and a height of 5 feet. The following is a crude illustration of the net:
        ___<--------------- 20 ft. ----------------->___
     ^  | |------------------------------------------| |
     |  | |##########################################| |
     |  | |##########################################| |
     |  | |##########################################| |
     |  | |##########################################| |
  5 ft. | |------------------------------------------| |
     |  | |                                          | |
     |  | |                                          | |
     |  | |                                          | |
     |  | |                                          | |
     v  | |                                          | |
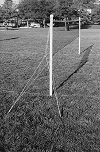
Making a Net SetIf you are low on cash (as many footbag players are), you can somewhat easily construct your own net set with materials costing less than $40 (U.S. currency). Here is what you need:
To construct the net, first attach the badminton net to the two post. Attach the top of the net first, making sure that the distance between the two posts is 20' when the net is pulled taut and the distance from the top of the net to the bottom of the post is 5' on both sides. Once you have attached the top of the net, the bottom of the net should be attached. It should be pulled taut from the top and from the other side so that it can provide some bounce off when the footbag is passed into the net. You may also want to use some ties to pull the middle taut for even more play off the net. Once you have attached the net to the post, you will need to attach the guy lines to the posts. Take a 15' length of cord or thin rope and create a loop at the mid point and a clove hitch or slip knot on both ends. Repeat this with another 15' length. When you set up the net, you will put the loop for each guy line on the posts and then pull the guy line at 30 degree angles from the post so that the net is taut. Usually, this will take at least 3 people to coordinate. The slip knots may be used to tighten the net. The spikes should be put in at 45 degree angles from the post so they are less likely to slip out if someone crashes the net. Before you can even set up the net, you will need to have your boundary lines set up. To construct the boundary lines start at one end of the 132 foot rope and attach one of the 3" nails. This can be done several ways, the most common being to tie a knot around the nail. Sink the nail into the ground and pull the rope taut measuring out 44 feet. Attach the second nail and sink it into the ground. At the halfway point, 22 feet, make some kind of mark to indicate where the net line. This can be done with a a colored string or electrical tape. Now, measure off 20 feet from the second nail, pull the rope taut and attach the third nail. Again, make some kind of mark at the halfway point (10 feet). This will be the center line marker. Repeat the process above with the second 44 foot length and 20 foot length. You now have a set of boundary lines.
|
|
|
|
|
|